My Hair Story in Photos

I wanted to document my hair story, starting from a photo in 2016 to now, taking a look at the health and color of my hair (a part 2 of sorts from my post “Brunette to Blonde“).

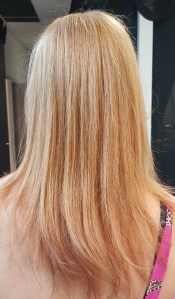
2016 – Dry and damaged hair. This is how my hair looked for years; I didn’t pay too much attention to it and continued flat ironing my hair every day to get rid of the frizz, leading to more damage.

Grew out color and most of the damage.

Cut out some heaviness and brightened with a color melt. Done at Style Theory in Calgary.

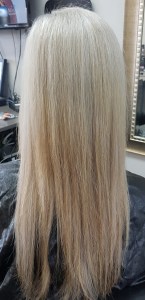
2018 – Grow out from the previous cut; the healthiest my hair has looked in years.

Caramel highlights; I don’t like how this turned out. Done at Style Theory in Calgary.

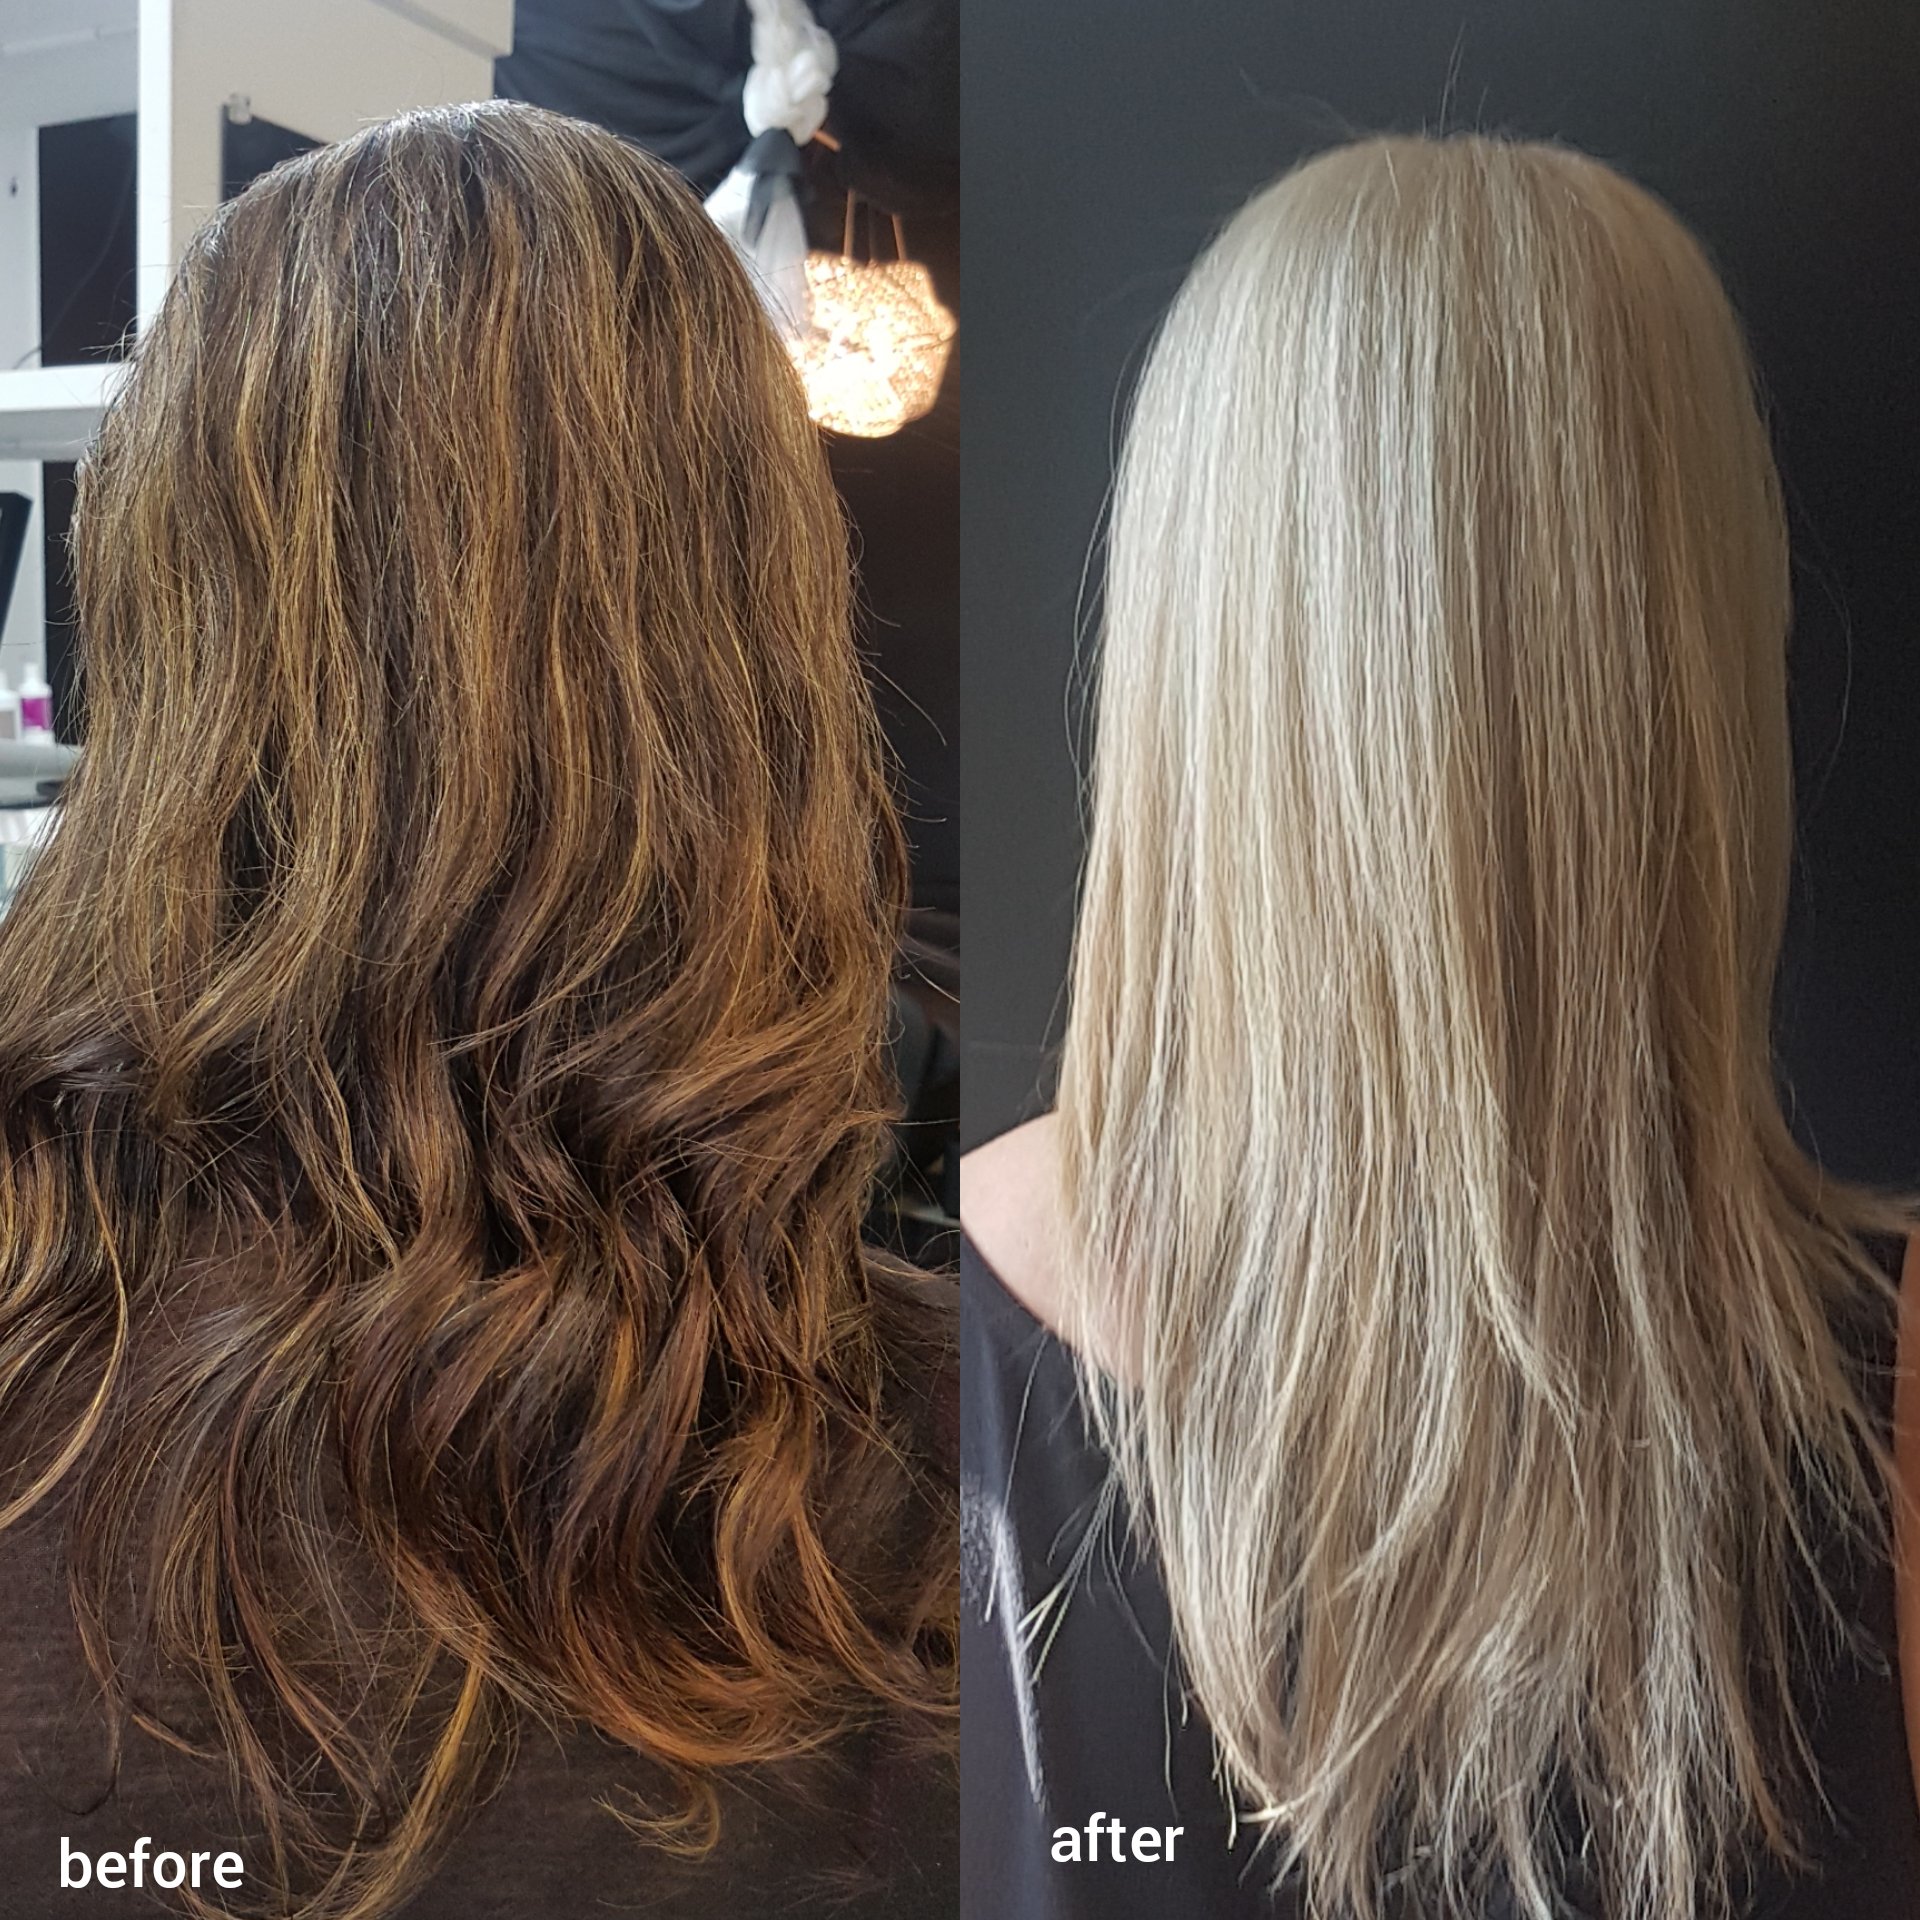
Going blonde; session 1. Done at Style Theory.

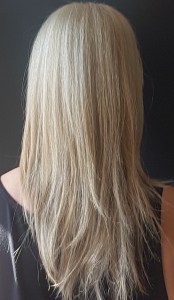
Ashy blonde; session 2.

Every root touch-up and tone, the shade of the hair was slightly different; I could never get it back to that ashy shade.

I left purple shampoo on my hair too long; there are about 4 different colors in my hair at this point.

Old color showing through on the bottom; ashy on the top and yellow on the bottom.

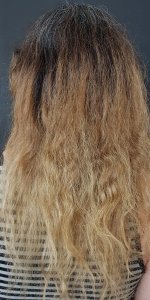
Attempt to blend the top half to match the bottom. My hair has started to look quite thin, damaged and dry at this point, despite my best efforts to keep it looking healthy.

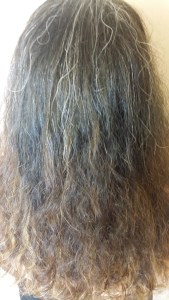
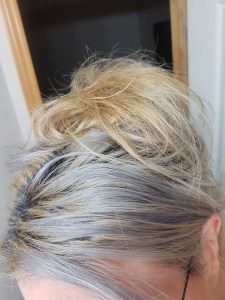
Air dried; looks dry and damaged. Comparing the health and look of my hair to the before and after blonde photos, it looks drier more frizzy and thinner, not to mention the stiff, dry feeling after getting it wet in the shower still after 5 months. The light hair against my scalp made it look thinner as well.

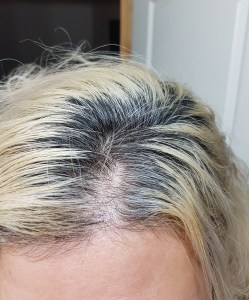
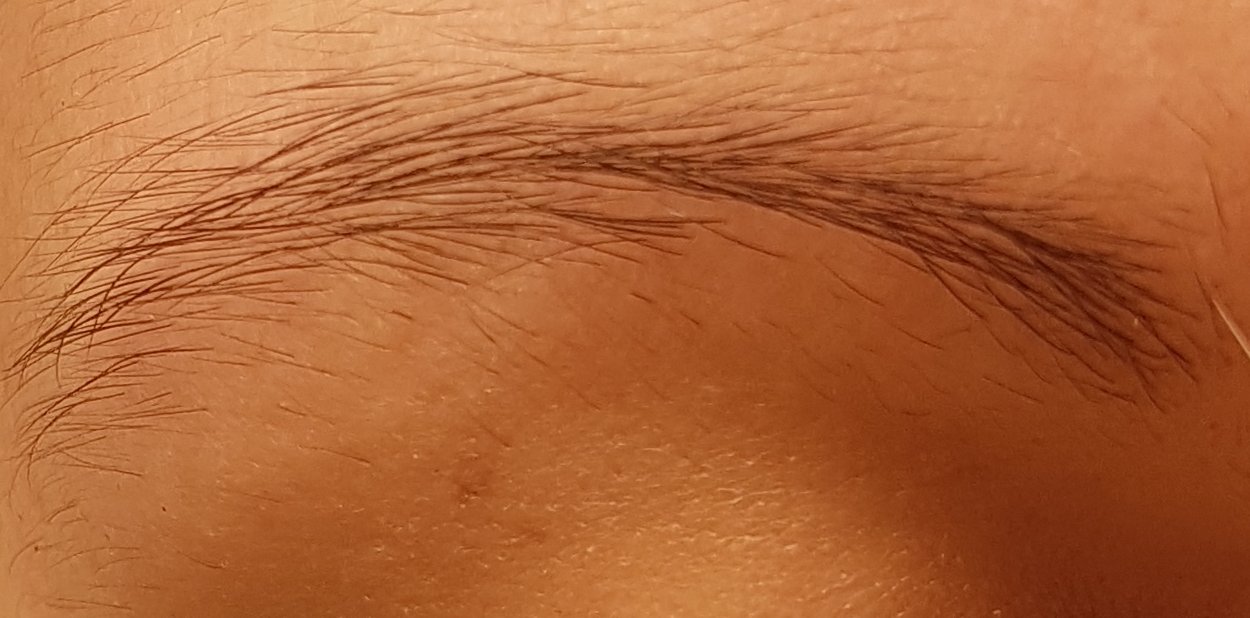
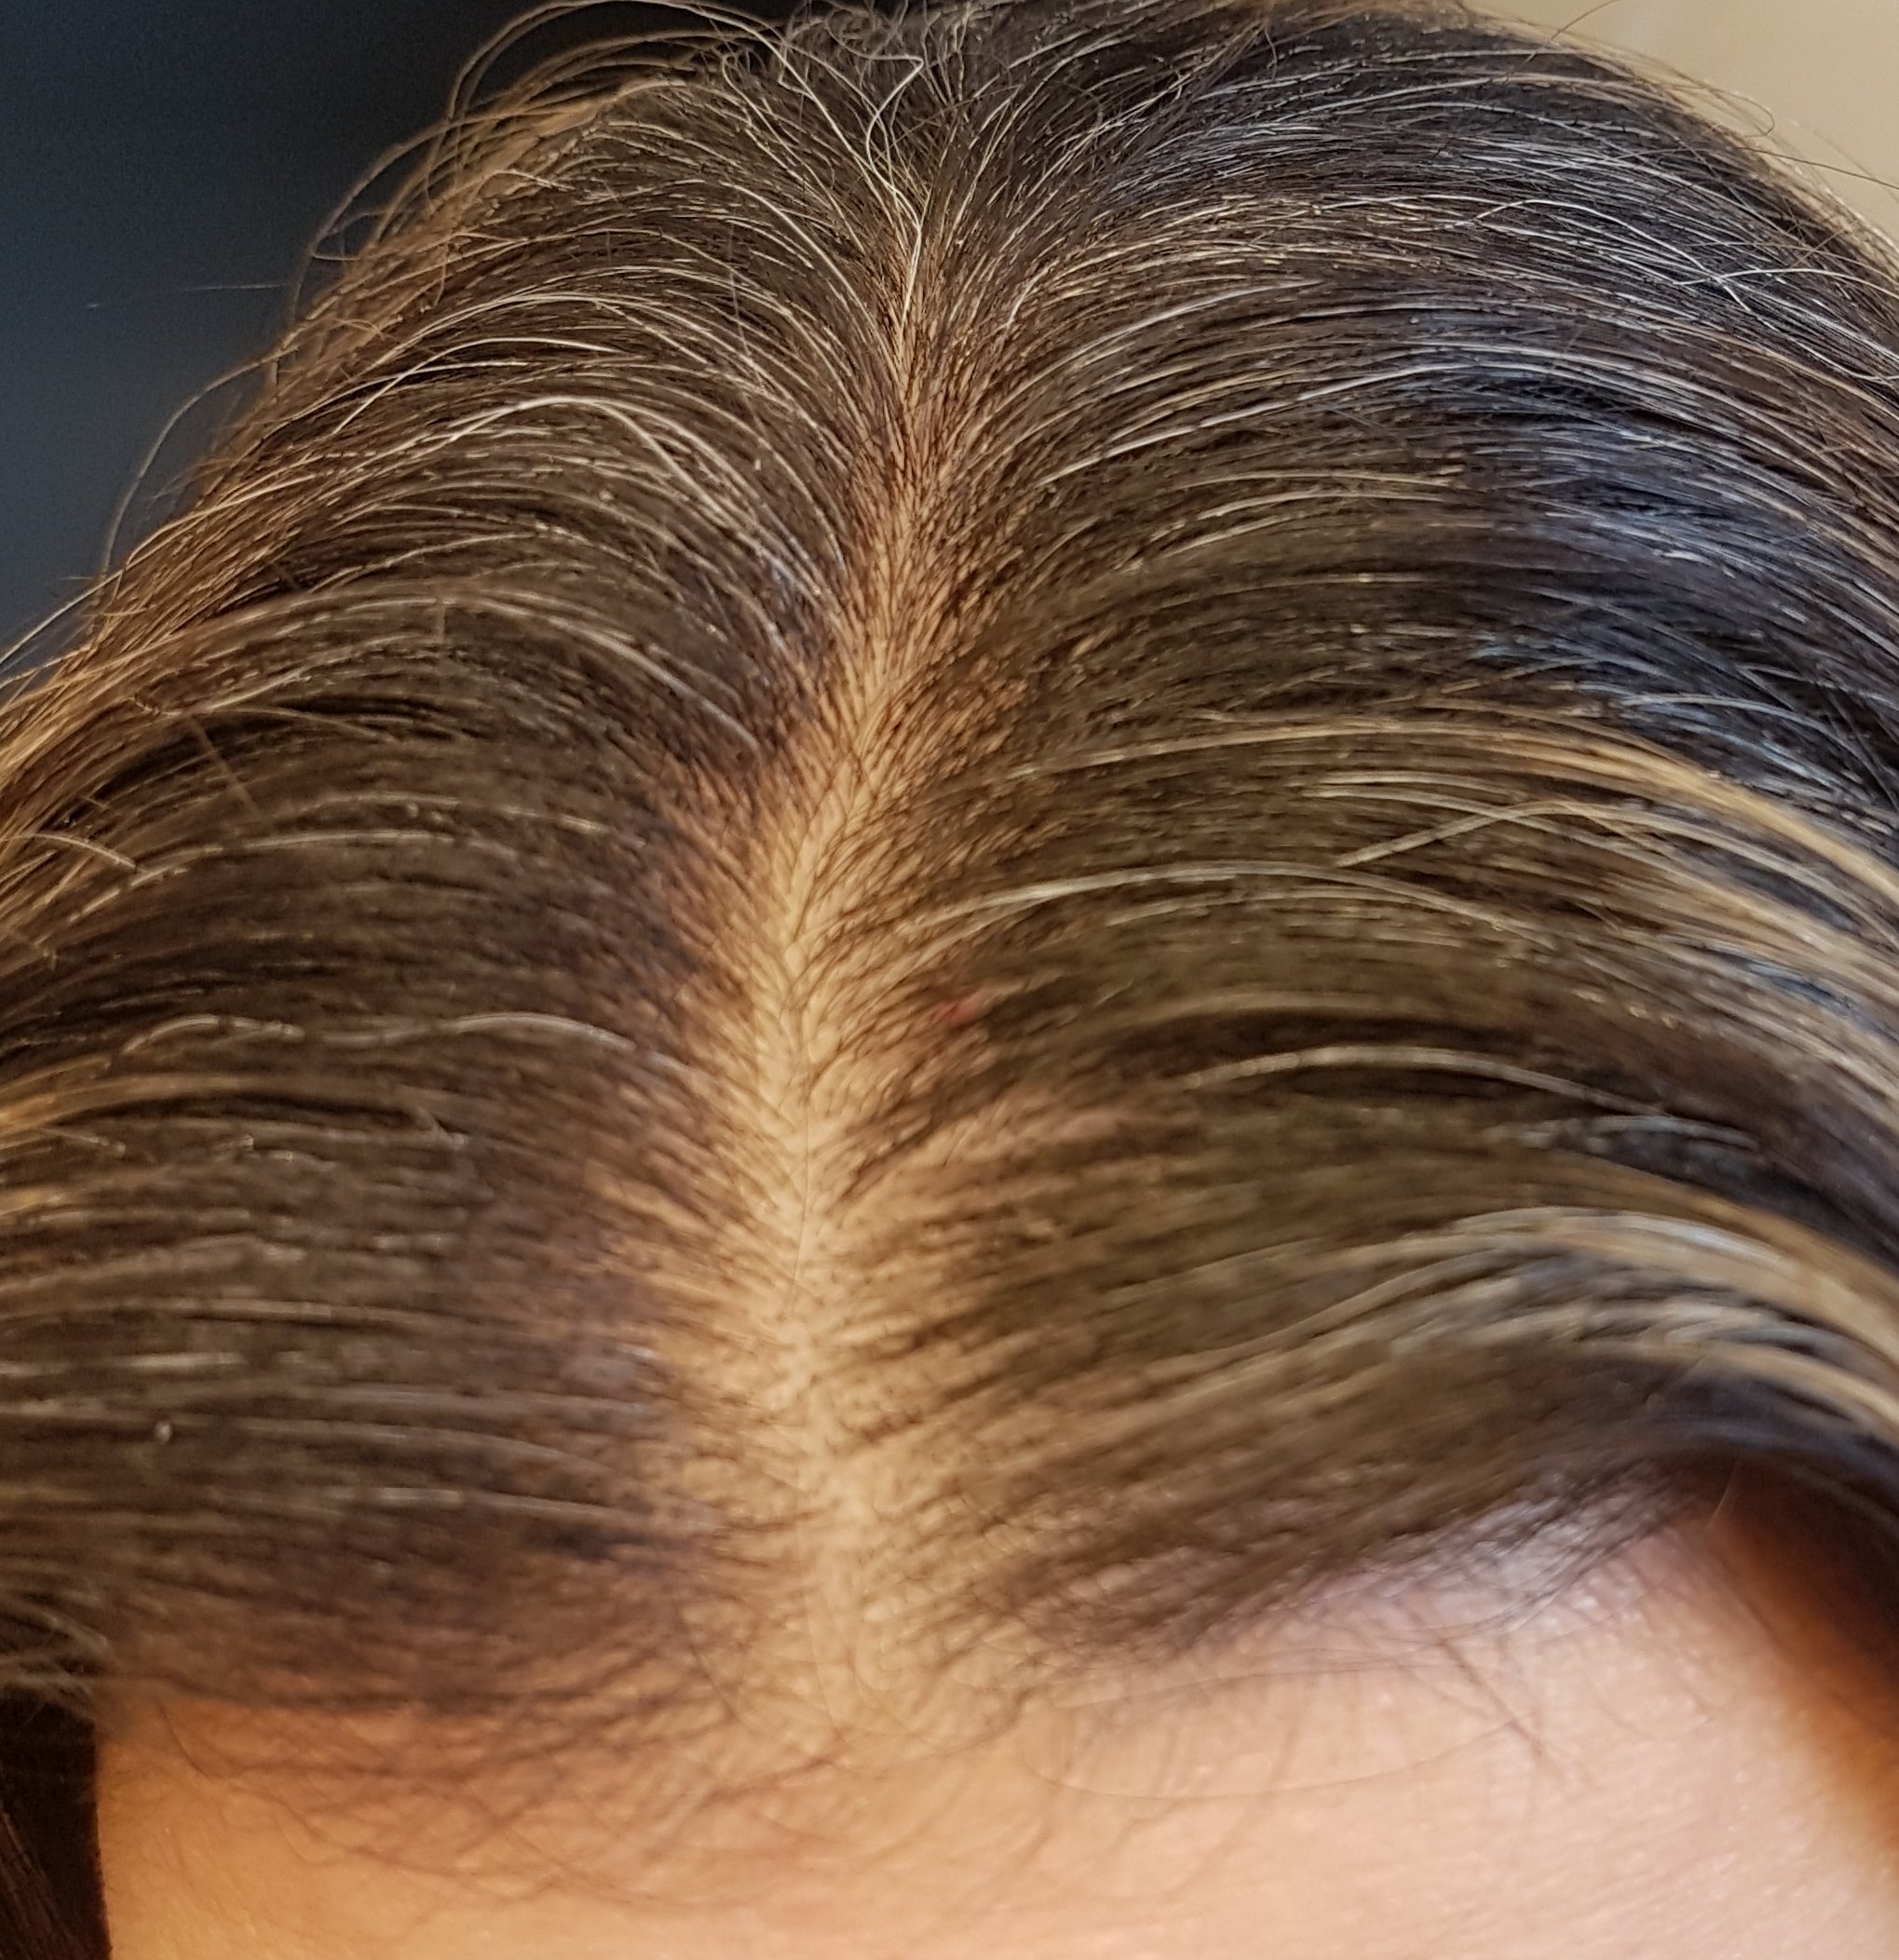
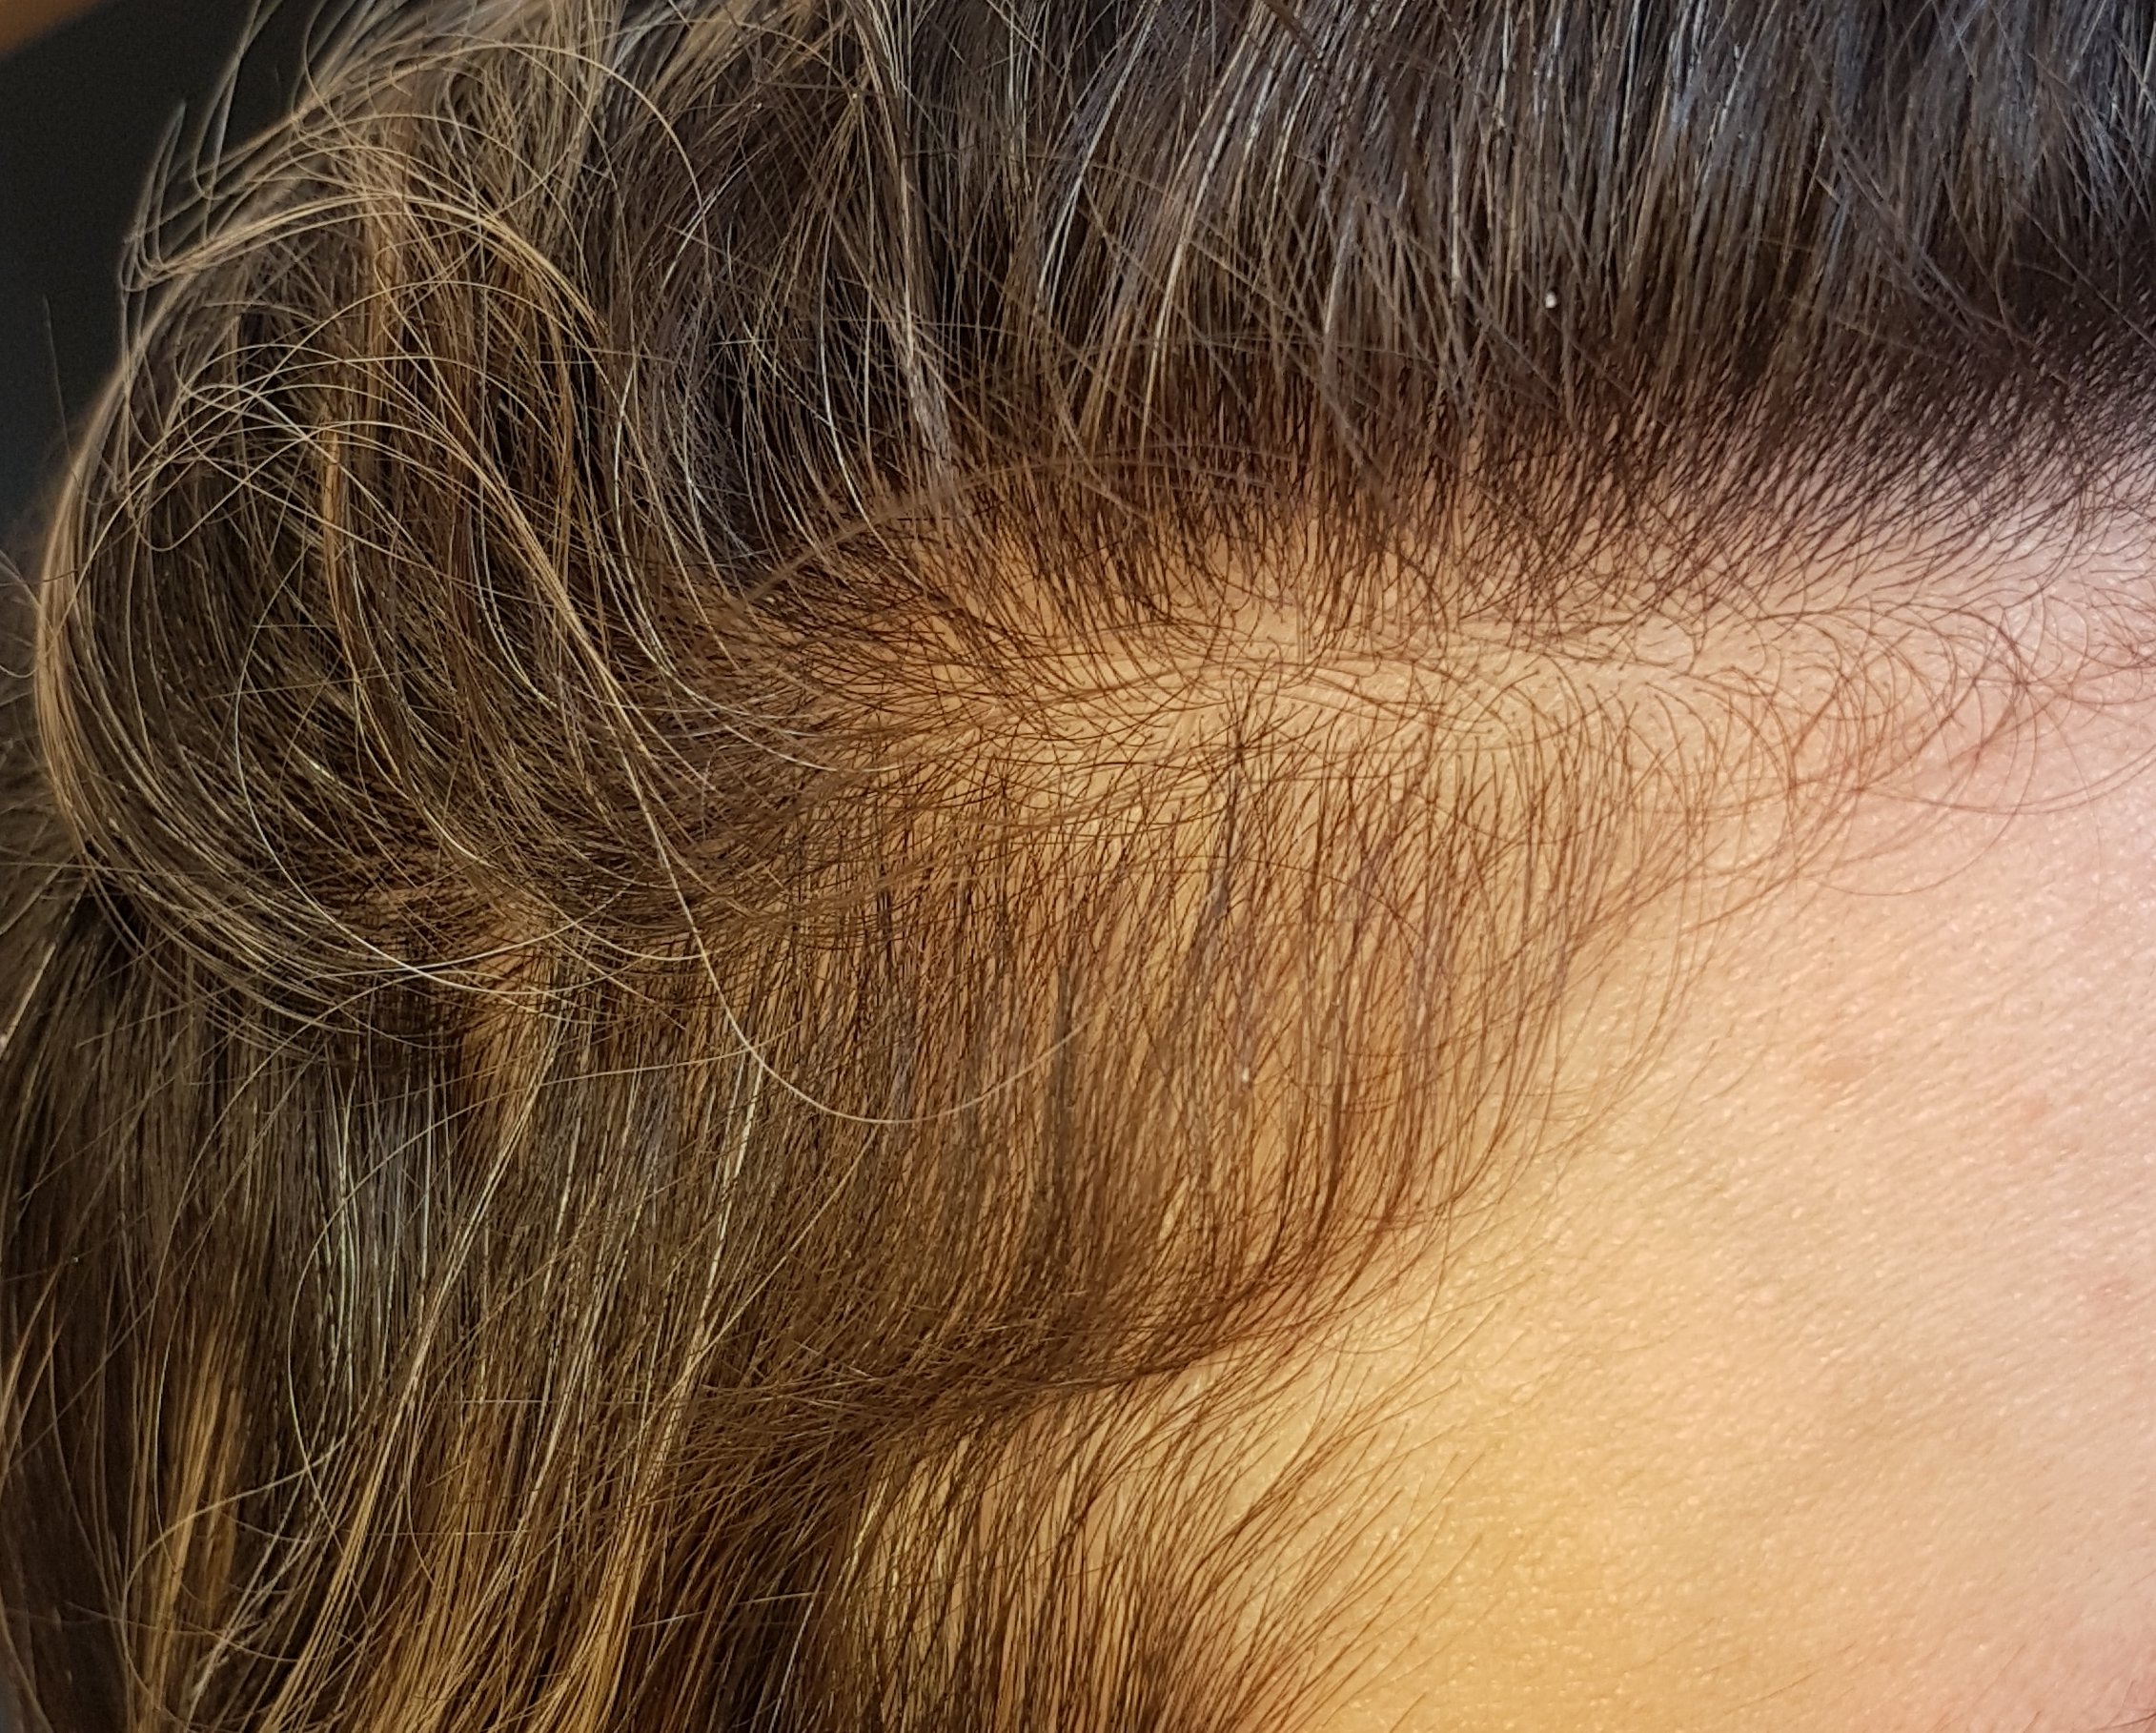
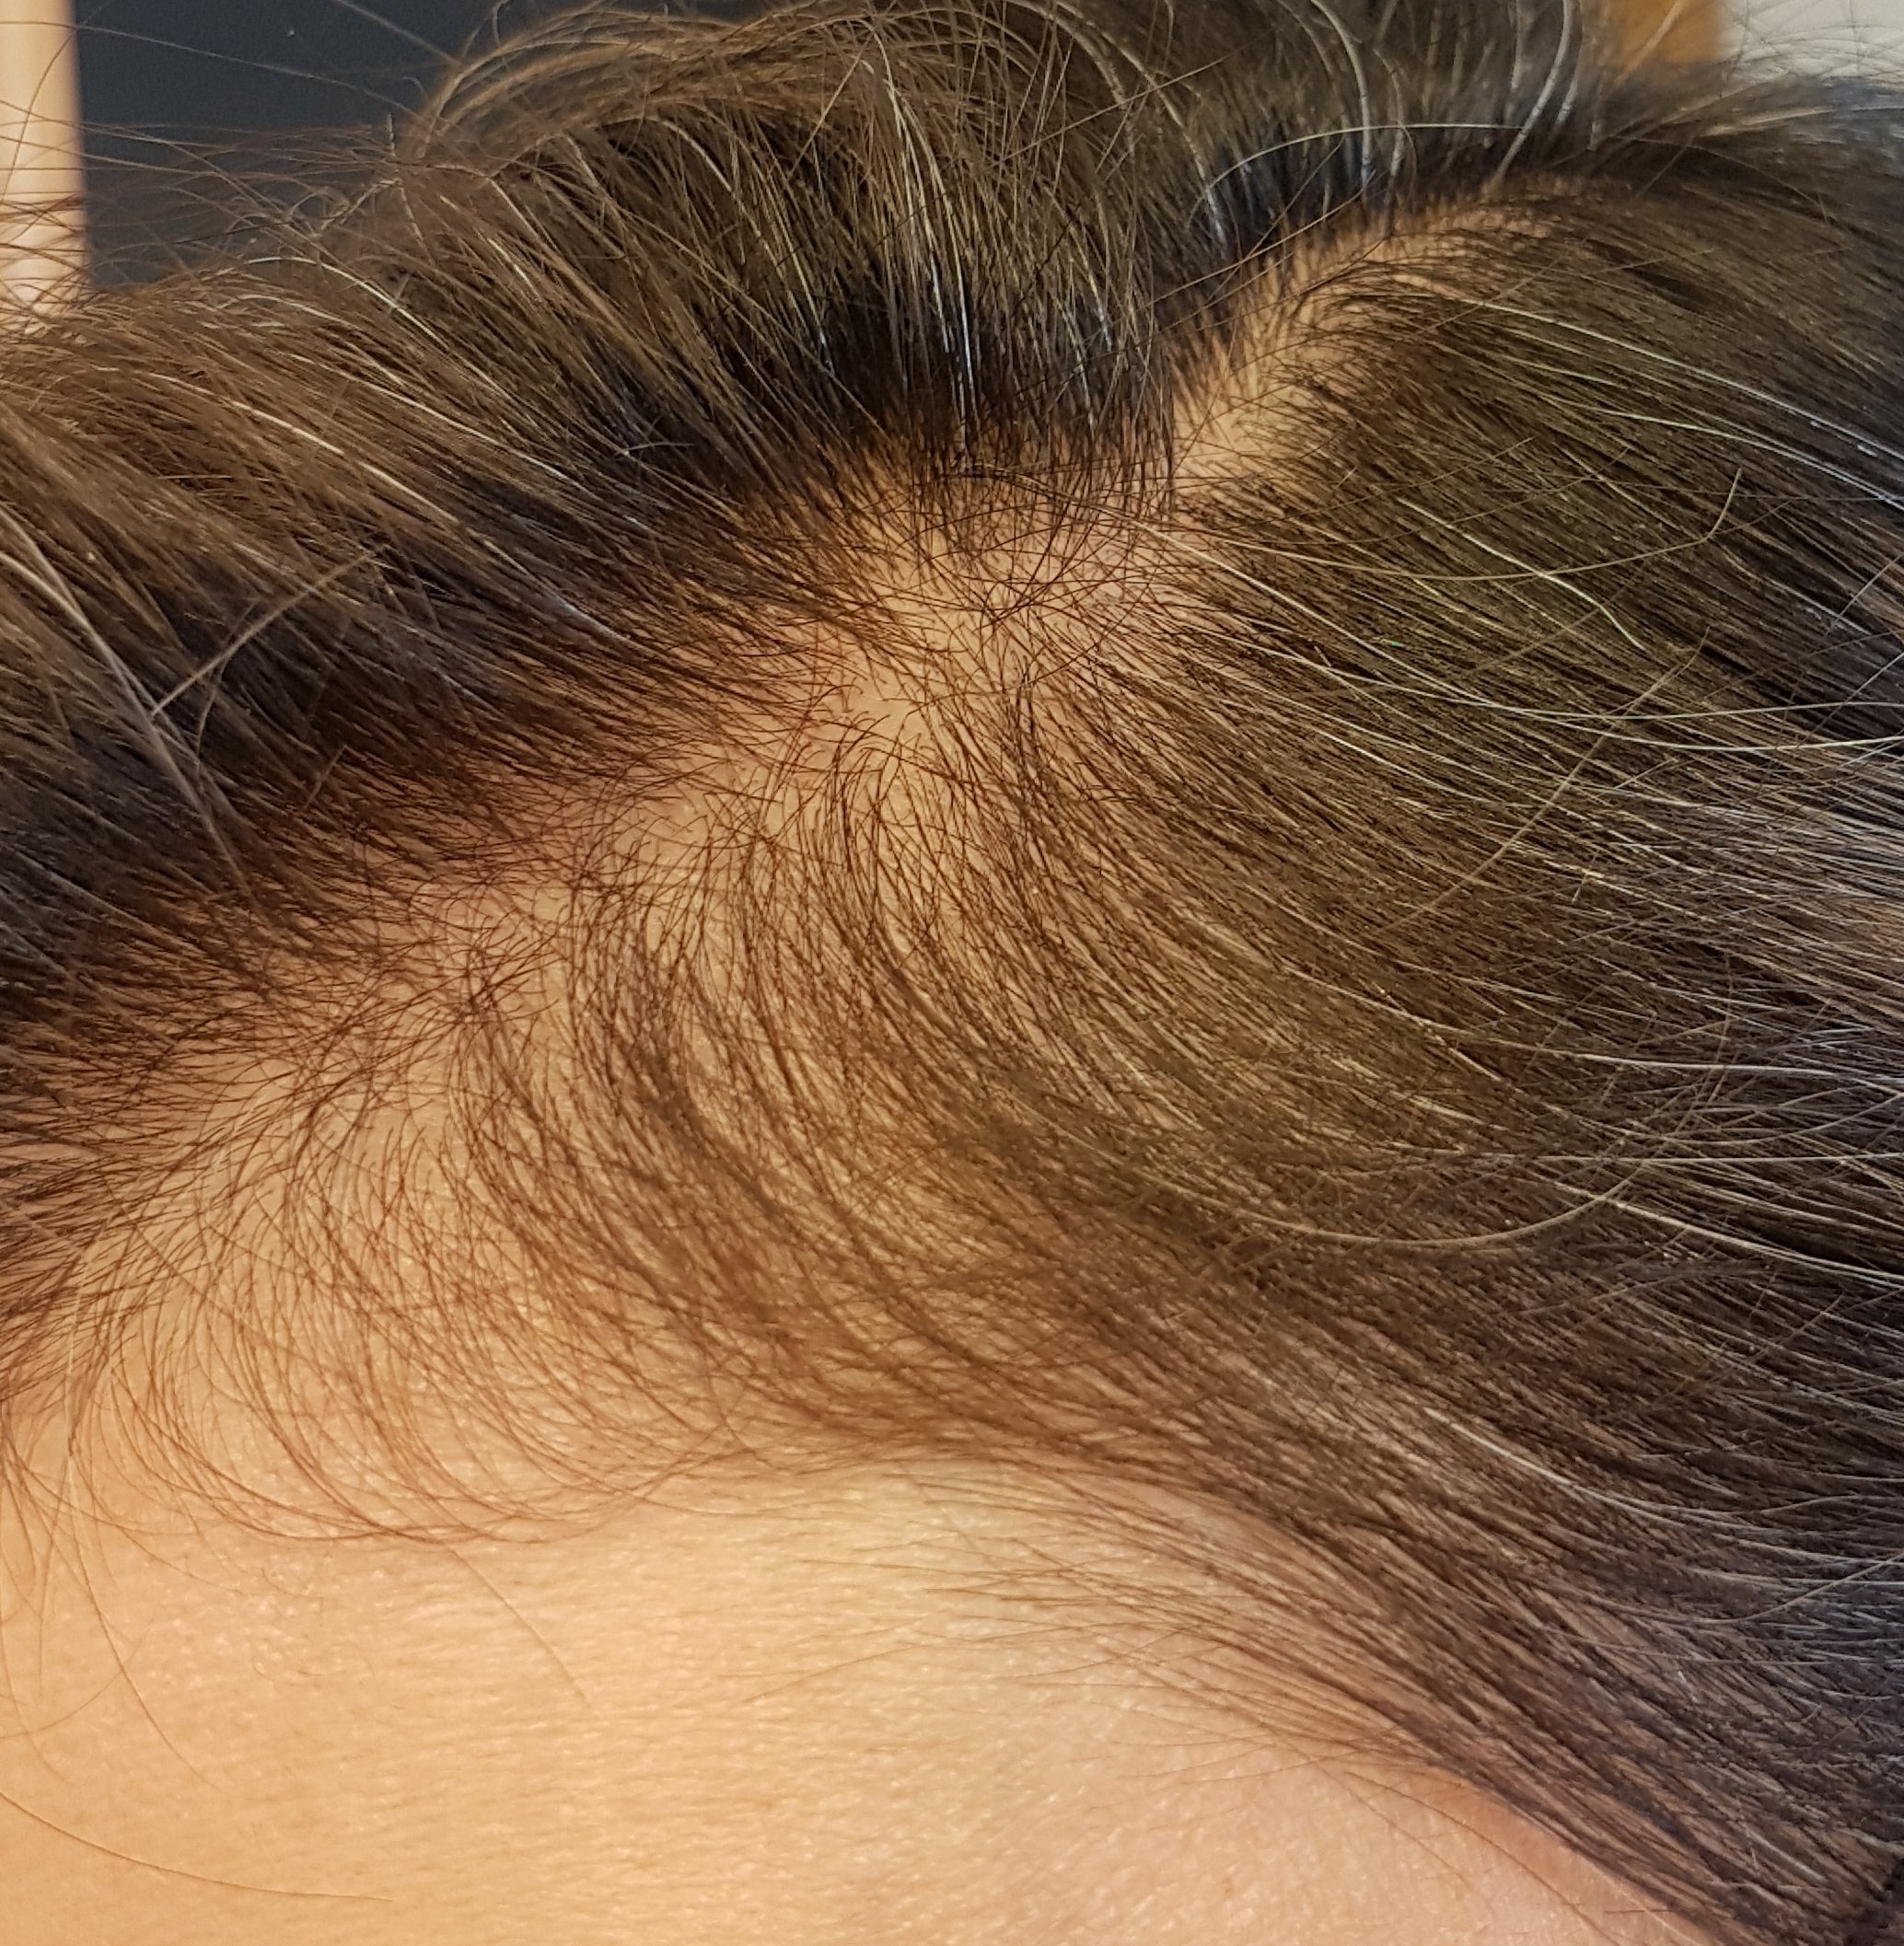
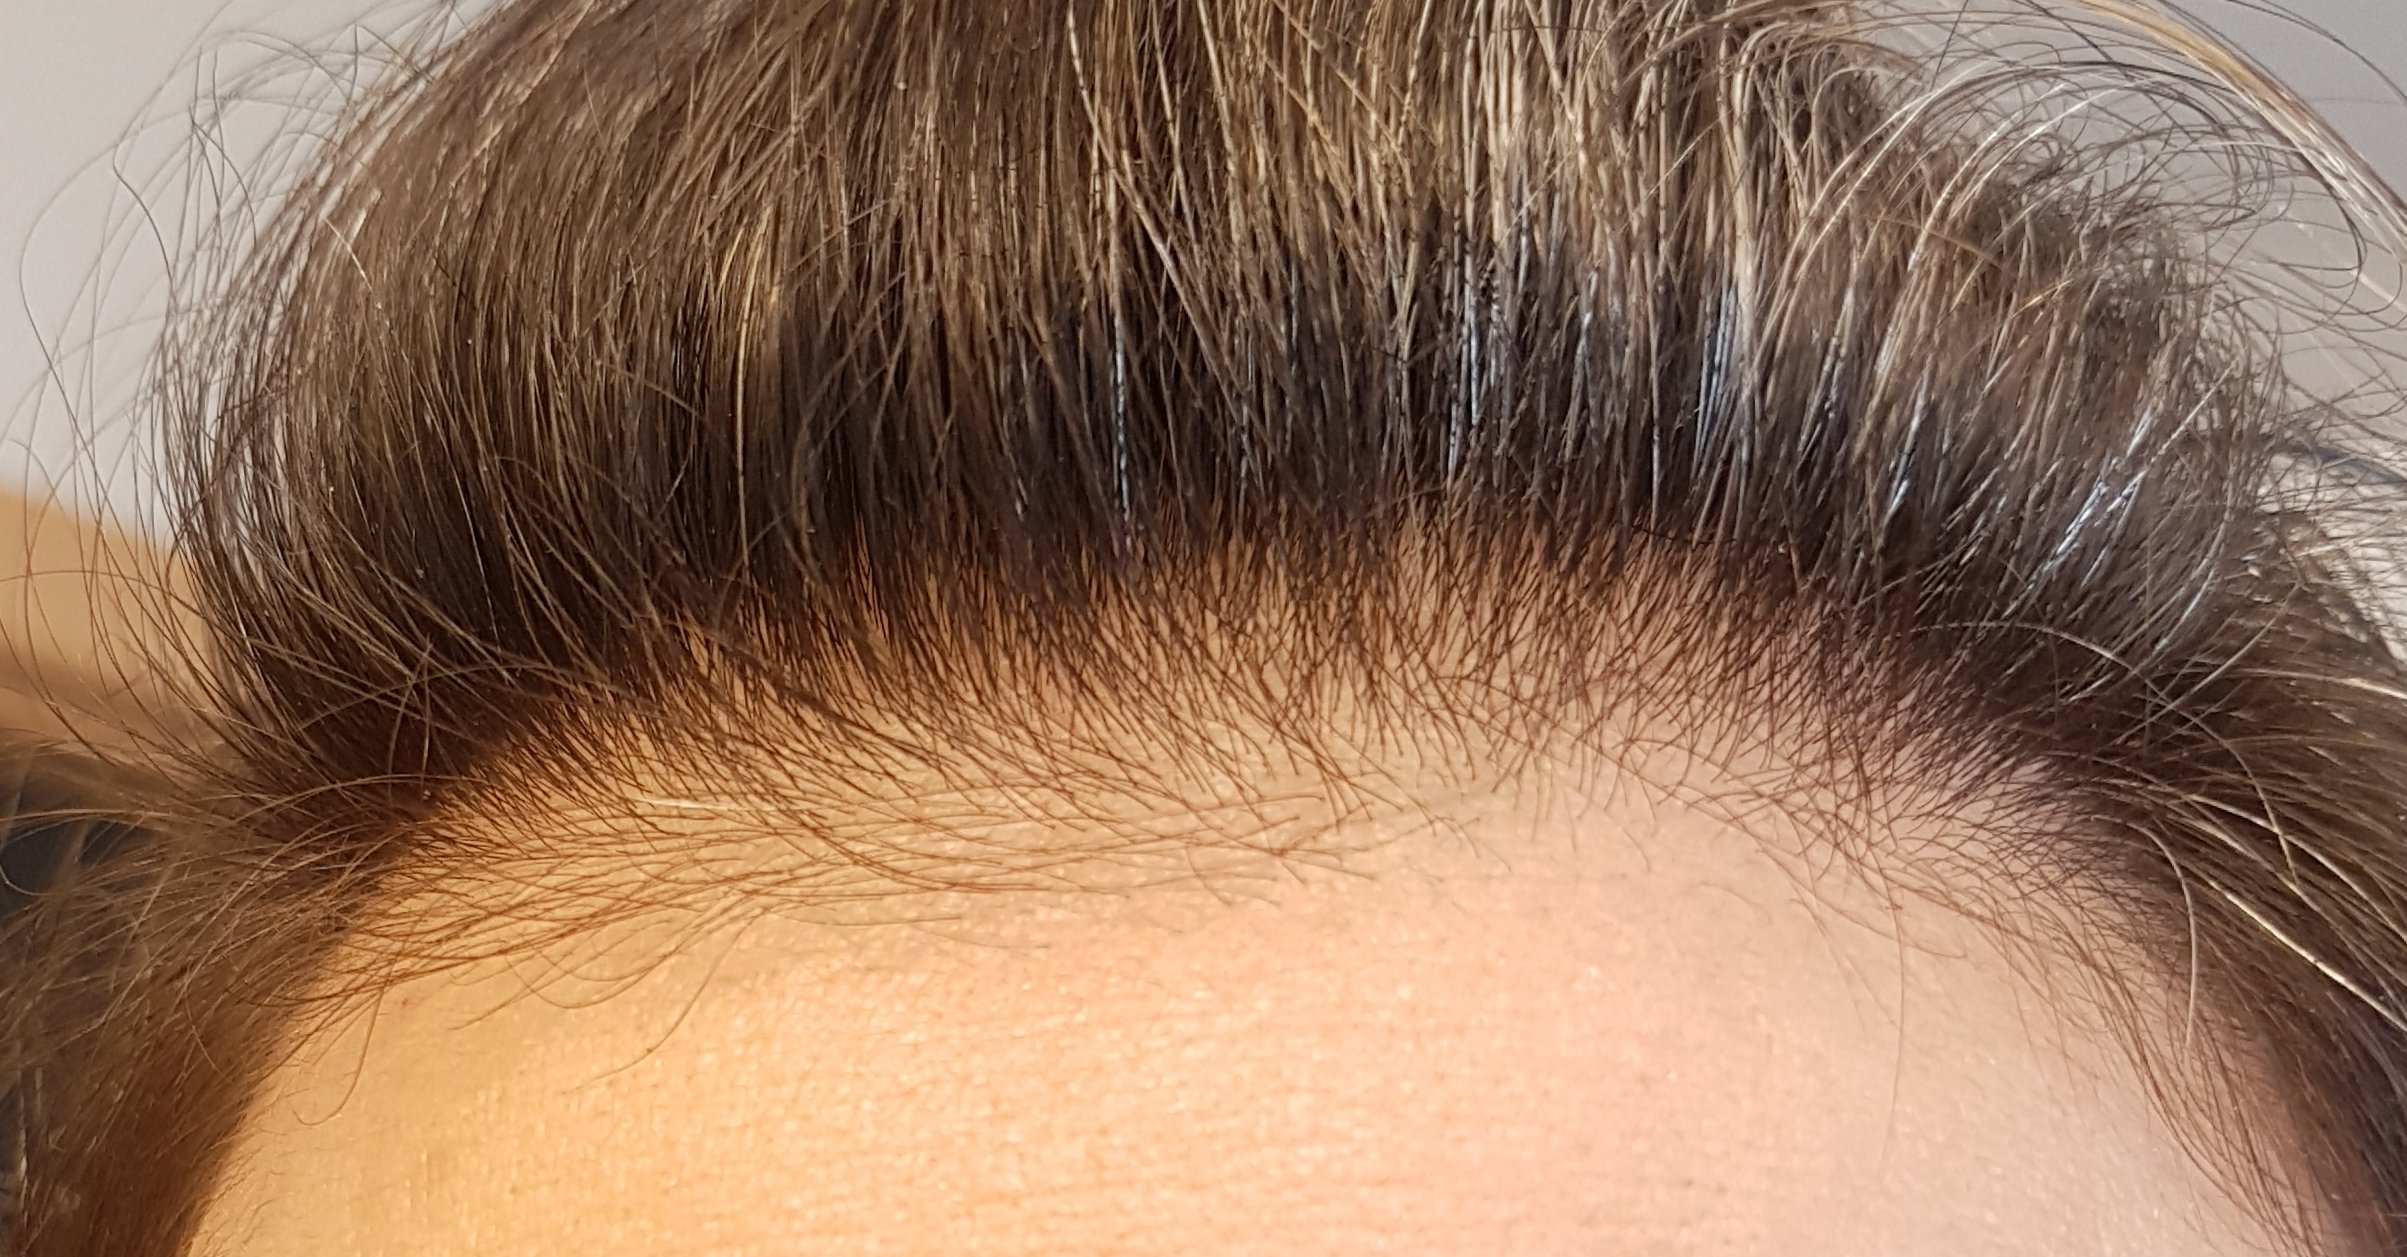
Have had thinning hair for a few years now.

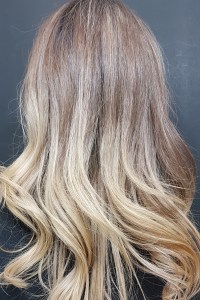
Ombre balayage with chocolate brown roots. This is my favorite technique so far, but could be blended better. I decided to get this color and let my hair grow out (I’ll still need to get grey coverage). It looks much better and is lower maintenance without the damaging lightening sessions. Also, the darker roots fading into the lighter color makes finer hair look a bit thicker.

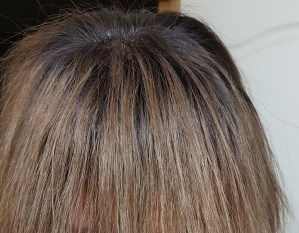
Cut in bangs to disguise the thinning hair.

New color line at the salon (Max Eli); more brown than I wanted and has a green tinge. Done at Style Theory by a Max Eli color educator.

The above brown hair faded quite quickly. I decided to leave my hair alone, just let it grow and try to heal it. It is dry, thin, breaking and looks quite bad. After numerous treatments, oils and conditioners, there was nothing I could do except cut the damage off.

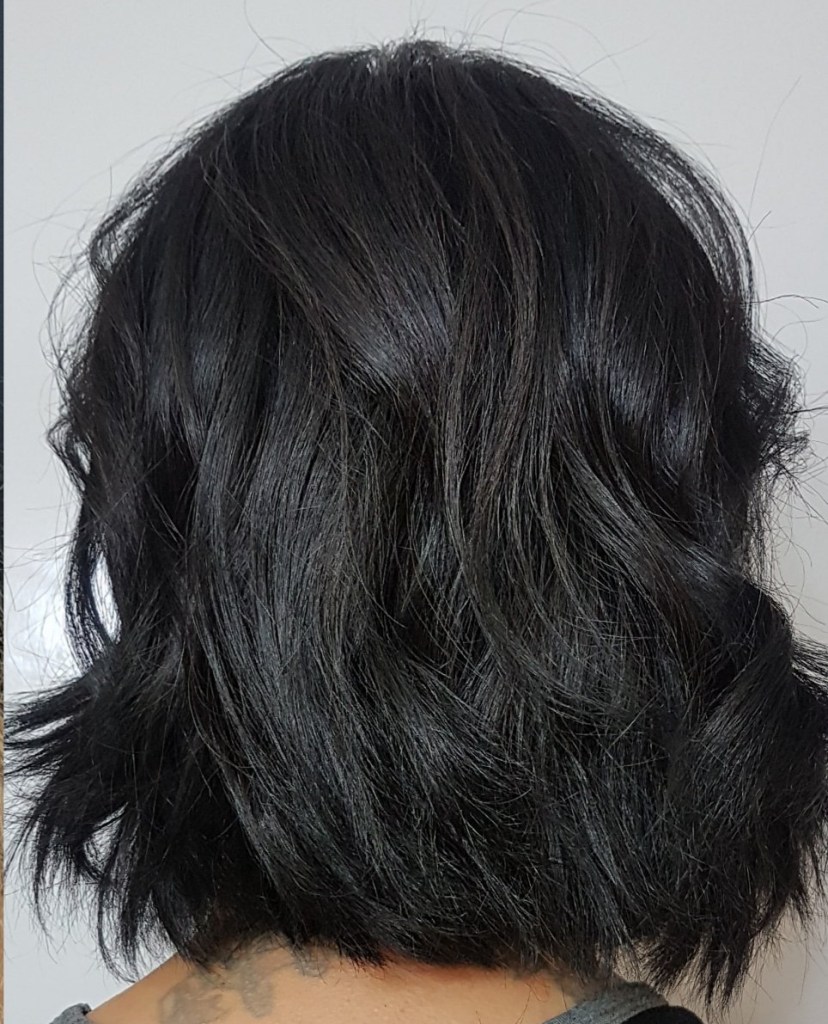
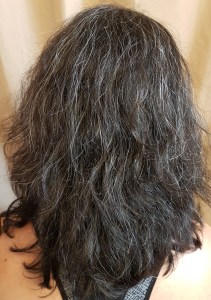
I went to a different salon to get a cut and color (Industry Hair Salon); I wanted a chocolate brown, but the hairdresser said he was going to go a bit darker as it would look better. This color is darker than my natural color. The cut is just okay; the color is too dark. I will not be going back to this salon.

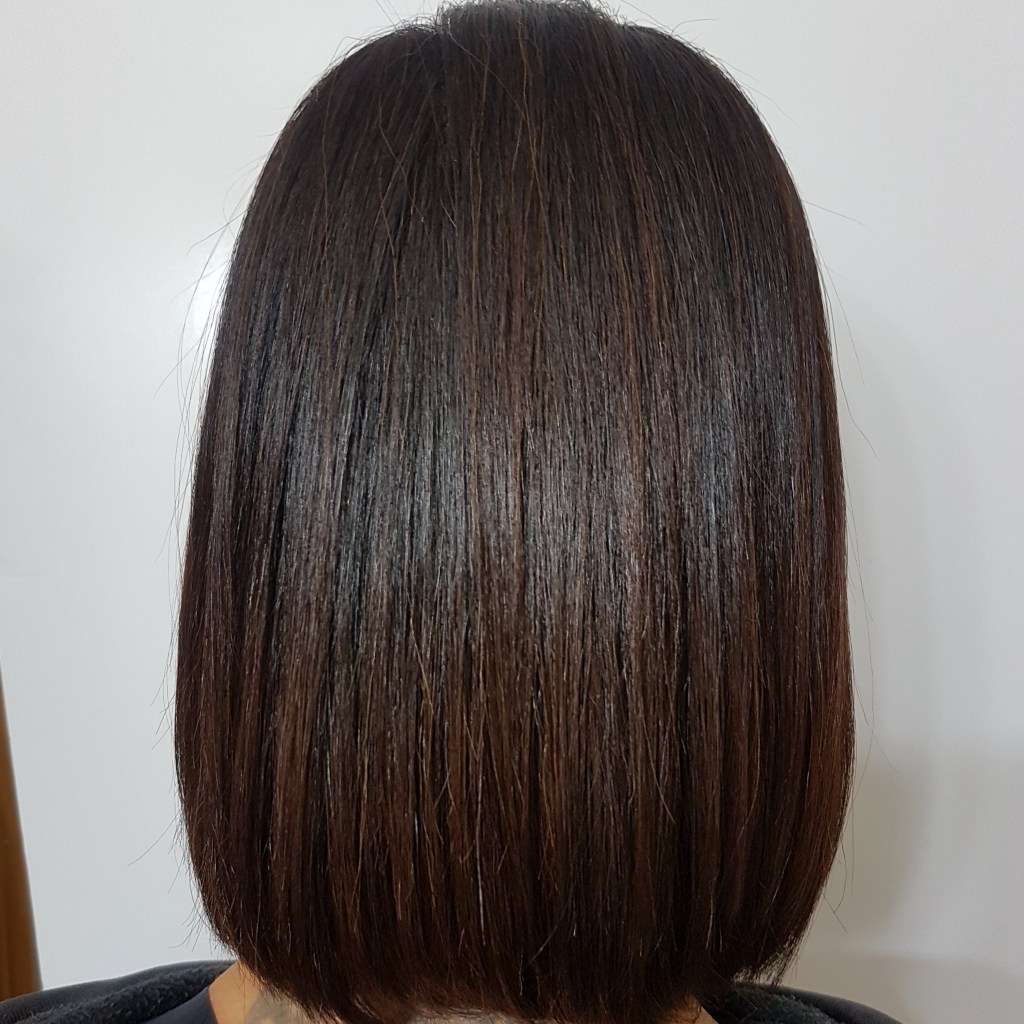
Back to my regular hairdresser (Style Theory) to get a keratin straightening treatment. This process lightened my hair. I will post a review once the treatment fades.

It took 7 months for the keratin treatment to fade from my hair.

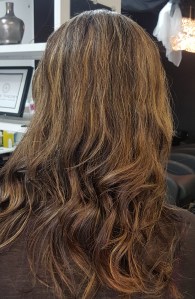
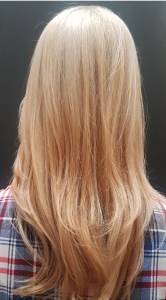
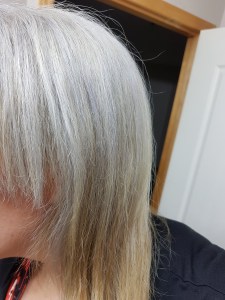
2021 – Most recent photo after growing out my hair for a couple years.

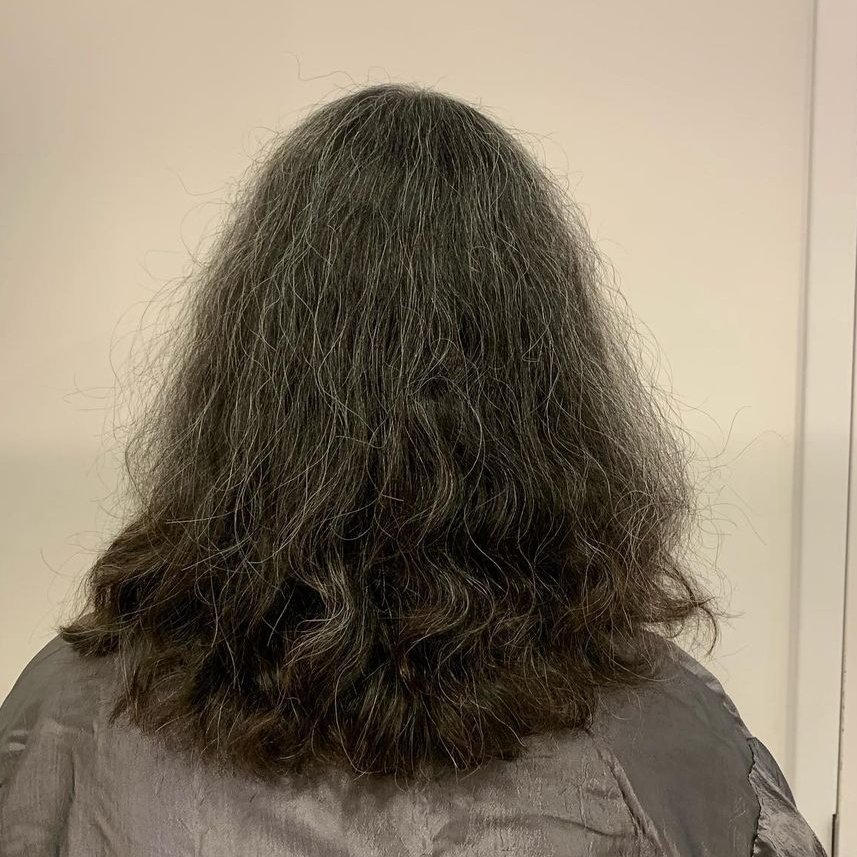
October 2021 (photo by styletheory.ca) – My first hair cut in about 2 years (shown above air dried) was done at Edges Salon in Calgary by a level 4 stylist. The hair felt heavy on the bottom and did not have much shape. The cut dried in an uneven frizzy triangle around my head. I went to Style Theory to get it fixed 2 weeks later.

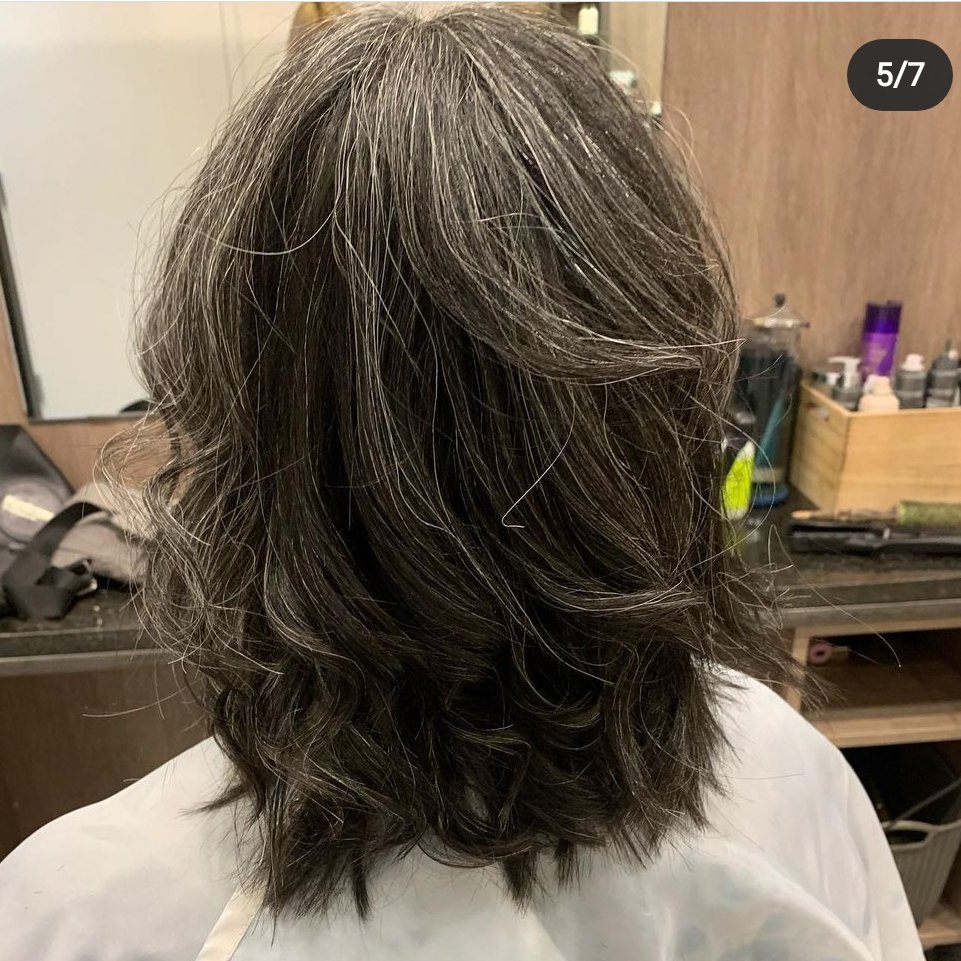
September 2022 – Not much new with my hair. I had grown it for about a year and have continued to use the K18 hair mask. At my last haircut a couple weeks ago, my hairdresser said my hair felt really healthy, I expect because of K18.

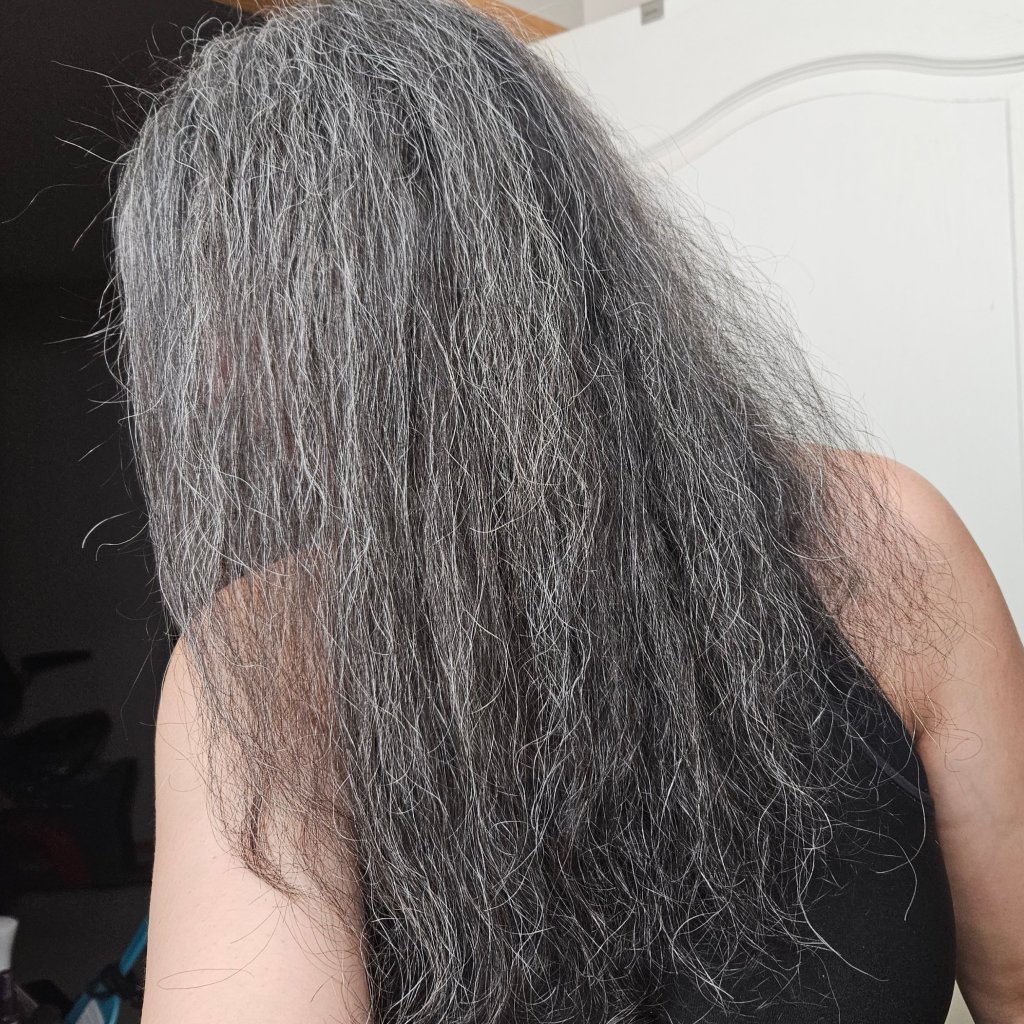
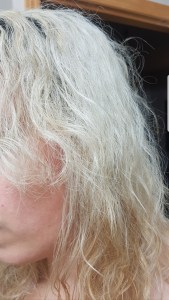
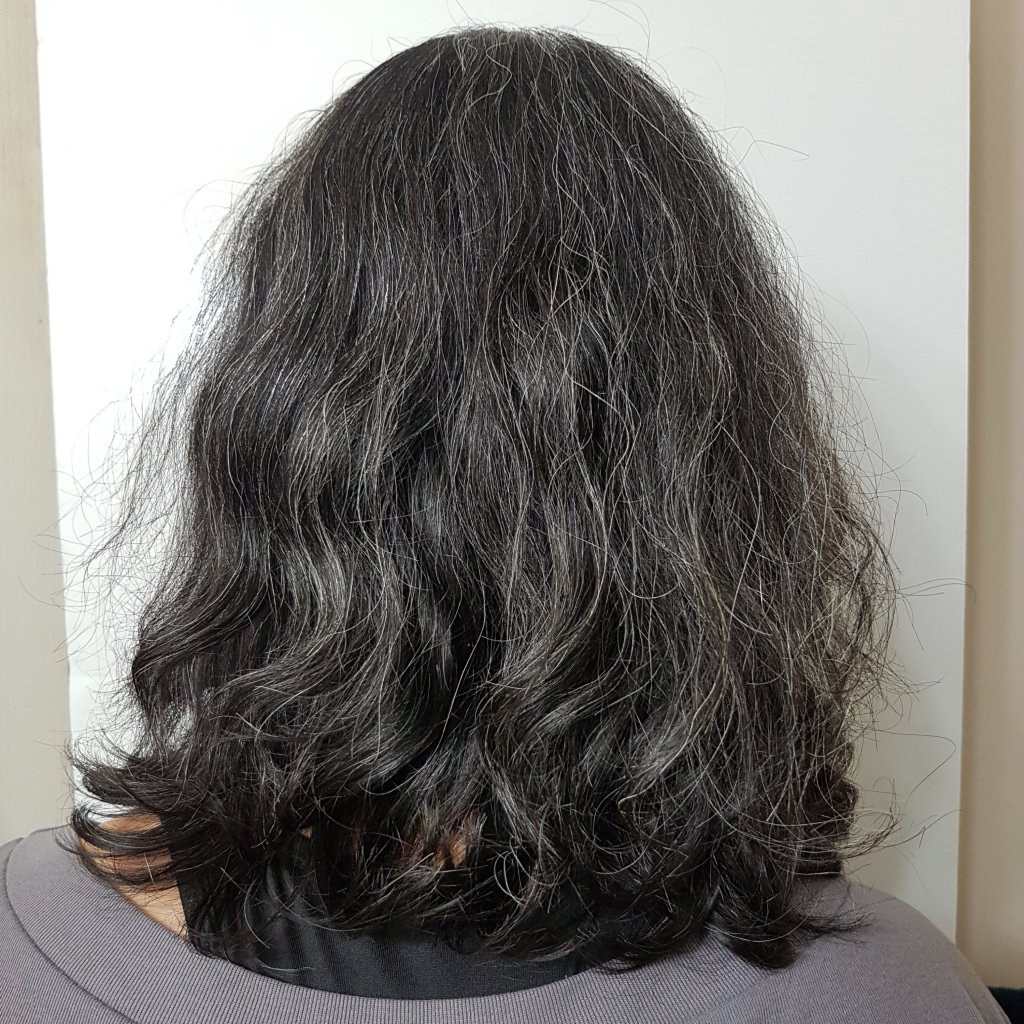
December 2023 – It has been over a year since getting my hair cut. My hair looks thinner, more frizzy, and of lower quality. I have started a new hair care routine to hopefully improve the health, look, and feel of my hair.

I will continue to update as I get my hair to where I want it to be.

Thank you for reading.

Briogeo Curl Charisma Chia and Flax Seed Coil Custard Review

Briogeo is a brand of hair care products that are 6-free (no artificial dyes, silicones, sulfates, phthalates, parabens, DEA) and color-safe. I have recently been using a few products from Briogeo (the shampoos and conditioners from the Don’t Despair, Repair line and the Be Gentle, Be Kind line) as I’ve been moving toward silicone-free products.

briogeo curl charisma

A newer product from Briogeo and their Curl Charisma line is the Chia and Flax Seed Coil Custard targeted toward those with curly, coiled and tightly coiled hair. This product claims to leave curls soft and supple while defining curls with a flexible hold.

Ingredients: Water, Ricinus Communis (Castor) Seed Oil, Cetearyl Alcohol, Cetearyl Olivate, Glycerin, Sorbitan Olivate, Butyrospermum Parkii (Shea) Butter, Oryza Sativa (Rice) Extract, Rice Amino Acids, Hydrolyzed Quinoa, Keratin Amino Acids, Persea Gratissima (Avocado) Oil, Linum Usitatissimum (Linseed) Seed Oil, Leuconostoc/Radish Root Ferment Filtrate, Salvia Hispanica Seed Oil, Lactobacillus/Tomato Fruit Ferment Extract, Cellulose Gum, Xanthan Gum, Microcrystalline Cellulose, Acyl Coenzyme A Desaturase, Dehydroacetic Acid, Benzyl Alcohol, Fragrance

This product contains a number of moisturizing alcohols and oils, along with the following key ingredients; shea butter that softens and hydrates the hair, rice amino acids to prevent frizz, flax seed oil for conditioning and chia seed oil that nourishes and strengthens the hair. This product contains protein as hydrolyzed quinoa and keratin amino acids.

The directions on the Briogeo and Sephora websites differ a bit from those on the container. On the container directions state to apply evenly through damp or dry hair and style as usual, whereas on the websites it states to apply in small sections of damp hair while twisting and stretching the strands to activate the curl pattern (I suppose how to apply might depend on hair type and preference).

This product goes on a bit white and dries invisible. This is a thick, creamy leave-in treatment that smells light and fresh.

My daughter helped me review the Coil Custard. She has curly, coarse hair that is dry and prone to frizz. She has used it a number of times now; the first application she used too much and the curls, while defined, were crunchy and a bit flat on the top of her head. On subsequent applications she used less.

curl charisma


curl charisma


For the before photos, the hair was shampooed and conditioned using the Briogeo Don’t Despair, Repair shampoo and conditioning mask and air dried with no other product. Some of the curls are not well defined (especially on the top of the head) and the hair is frizzy.

For the after photos, the hair was washed and conditioned with the same Briogeo products and the Coil Custard was applied throughout the damp hair with no twisting or stretching and air dried. It goes on slightly sticky and white, but as it dries, the stickiness and white color disappear. The curls do not feel stiff or crunchy and still have movement and bounce. Looking at the photos, the curls look defined and there is no frizz. The softness of the hair is improved. Scrunching my fingers through the dried hair I can feel a bit of the product. I wouldn’t say residue, but not like a leave-in conditioner that seems to absorb into the hair; however, not an off-putting feeling. I put a bit of product on my fingers, rubbed it in and let it dry and there is kind of a smooth, protective layer on my fingers that leaves no friction and they feel a bit moisturized.

My daughter’s next-day curls lose definition and become quite frizzy. With this product, the hair in the above 36-hour photo, while messier, is not frizzy and still has the curl.

I tried the Coil Custard a couple times on my hair as well. I have thin, wavy, frizzy, bleached, dry hair. I’m not sure my waves were more defined, but the curl custard took away the frizz (which probably enhanced the waves). One thing I am very happy about is how the product helped my longer bangs. They are not quite long enough to tuck behind my ears and turn into a frizzy, dome-shaped mess when air dried. I usually have to straighten them or clip them back. With this product I let them air dry and they look great; I don’t have to do anything else with my hair. At night I put my hair in a high bun and when I take it down in the morning, my hair has volume, some bigger waves and looks quite good just left down with no other styling.

In the before photo above my hair was air dried with a leave-in conditioner. The after photo is next-day hair after washing and applying Coil Custard in the morning and air drying, then putting in a bun overnight. These bigger, voluminous waves stay all day, and last multiple days if I put my hair in the bun overnight. This is an easy, no fuss hair style that, before Coil Custard, I had achieved using a flat iron, curling iron and hair spray.

I don’t think my hair was softer after using the Coil custard, but I’ve not used this long-term and my hair has a number of issues with being bleached.

I would prefer this product in a tube.

My daughter and I will continue to purchase this product.

Thank you for reading.

Three Month Results – The Ordinary Multi-Peptide Serum for Hair Density

20180613_1333008402756878716784672.jpg

I’ve been using The Ordinary Hair Density serum for thicker, fuller, healthier hair (and eyebrows) for 3 months. Over the summer I got my hair colored blonde and while I like to change as few variables as possible while reviewing products (I had been using the hair serum for 3 weeks before going blonde), I also wanted to see how my hair grows and let my roots grow in a bit so it is easier to see the results. You can read about the hair serum ingredients and use in this post. I’ve used about half the bottle so far and will post the 6-month after photos in the coming months.

incollage_20180909_1102478772879639870689962865.jpg
incollage_20180909_1104516425666818248765758768.jpg

I kept forgetting to apply the serum to my eyebrows, so I probably used about every second evening. I don’t think there is much difference in growth or thickness.

incollage_20180908_1317263832522889254227725648.jpg
incollage_20180908_1327069153799080197703327528.jpg

Looking at the front of my hair, I think I can see a bit less of my scalp in the after photo. Toward my forehead in the next photo there is definite hair growth.

incollage_20180908_1527109215349825202921130805.jpg
incollage_20180908_1530139665643466779118031006.jpg

The edges of my hair have shown some growth and thickening as well. Looking at the root grow out, the edges and front of my hair seem to grow slower than more towards the back (or there is just such thin hair the grow out is not seen as well).

I was surprised to see that I got results with hair growth after 3 months, as I definitely did not notice any results in the mirror. I will continue for another 3 months and write an update at that time, so keep an eye out in December for those photos. Click here for the 6-month results.

Thank you for reading.

Brunette to Blonde

My journey to blonde began months ago with a dream I had one night – I was at my usual hair salon, about to get my hair colored and cut by a stylist I had never been to before and she had had a few glasses of wine and suggested I get my hair colored blonde. I have dark brown hair with bronzed highlights and warm medium skin. I was reluctant to let her color my hair, as she was drinking, and suggested she ask my regular stylist what she thought about me going blonde. She started crying, saying I didn’t trust her to do her job, and that is when I woke up.

The below was done by Style Theory. See here for a part 2 update.

incollage_20180728_1532299746392649663694537277.jpg

I began by reading online about what to expect, maintenance and what shade of blonde would look best with my skin tone and then started to work on getting really healthy hair. I wanted to get my hair as hydrated as possible and used leave-in conditioners, hair masks and hot oil treatments, stopped using my flat iron and bought a UV protectant.

The hairdresser started with the bleaching process while using Olaplex. Here’s a photo of about midway through:

incollage_20180728_1614598634648991974806802221.jpg

My hair got a bit lighter than this, but with being so dark, didn’t lighten to the level she wanted and was pretty yellow, so I was worried how it would look when dried. No worries though, my hair was then toned to a pretty strawberry blonde color.

incollage_20180728_1611288268318817563092926385.jpg

After this first stage of color, I continued hydrating with masks and oils and used Olaplex No 3, the at-home version, to repair and strengthen the hair. Olaplex strengthens and protects the hair by relinking broken disulfide bonds from chemical services, heat and mechanical damage. After giving my hair time to heal and hydrate for about 3 weeks, I was ready for the next session, this time using Malibu Color Prepare the day before the service. To use Color Prepare, shampoo and rinse, add water to the crystals, work through the hair, leave on for 5 minutes, then shampoo and rinse. Do not condition. This treatment prepares the hair for color by removing minerals to ensure color coverage and extends vibrancy of color.

For the second session, she bleached while using Olaplex, and then used a number of treatments and toners.

incollage_20180728_1638535747611563284160049624.jpg

A few days after this session I went back to the salon to get the Ultra Bond and Seal treatment. The Bond treatment replenishes keratin, protein and amino acids after multiple color services such as I had. It also helps relink and strengthen broken disulfide bonds in the hair. The second treatment, Seal, fuses the repaired bonds into the cortex (middle layer) of the hair. The first and second treatments were left on wet hair for about 15 minutes each. After this treatment, my hair was bouncy, soft and shiny.

Maintenance and care of blonde hair is something I’m still working on, finding the right products that work for me. The first time I washed my hair after the first blonding session, I was shocked at my hair texture (while actual texture doesn’t change, porosity and elasticity does, and the hair feels very different). I read articles about dry, straw-like hair after a bleaching process, but that didn’t prepare me for the actual thing. I thought it was the new Schwarzkopf BlondMe shampoo I was using. After trying two other shampoos (Malibu Color Wellness and Balance from Josh Rosebrook), the BlondMe shampoo is more drying than those, but still as I was rinsing these shampoos off my hair, it seemed to become swollen with water (because the hair is now very porous), tangled, stiff and straw-like. After conditioning, my hair smoothed out and felt relatively normal after drying.

20180730_1055532253114710701792817.jpg

Blonde hair needs purple toned shampoo to prevent unwanted warmth; the yellow, brassy color on light blonde hair. As mentioned, I’m using the Schwarzkopf Professional BlondMe Tone Enhancing Bonding Shampoo for cool blondes. While neutralizing warm tones, this shampoo also creates new bonds in the hair fibers.

Blonde hair is dry and fragile; I need to prevent breakage and only use a wooden comb and have stopped using a flat iron. My hair stylist told me, when washing my hair, before shampooing, put conditioner on from about the mid-shaft area down to the ends, shampoo the roots, rinse and condition all the hair. This prevents dryness and breakage at the ends. Deep conditioners, hair masks, oils and Olaplex No 3 helps with damage, dryness and help protect the hair.

My makeup and jewelry had to change a bit as a result of the blonde hair. Instead of using the warm corals and bright pinks for blush, I now look better in a pale pink, and rather than my usual rose gold earrings and nose ring, I have switched to white gold.

The blonde hair seems to bring out the redness in my complexion, so I need a bit of concealer. My black eyebrows are more noticeable and they will have to be well maintained. I recently purchased the Fab Brows kit in slate/black and the slate color has a mattifying effect and helps the eyebrows blend a bit better with the ash blonde hair.

Of course, cost, number of sessions and time will depend on your hair; do you have old color, virgin hair, boxed color and/or damaged hair? The process can also be affected by the hair stylist’s experience. I am lucky that my hair stylist is a blonding specialist and a specialist in treating damaged hair. I’ve been to salons previously wanting to get my dark brown hair to a light brown, only to be left with burgundy hair.

This process can be listed as a color correction with charge by the hour. These two blonding sessions, for me, were about 9 hours total. Consultation is key. Roots need to be touched up every 4 to 6 weeks, depending on growth. While waiting a few months for touch ups may seem cost effective, the color service can take longer and cost more in the end.

img_20180723_105055_0945450846067552419160.jpg

Maintaining blonde hair:

  1. Wash your hair in room temperature or cool water.
  2. Wash your hair less often. The washing process is drying, as it washes away natural oils. While I have an oily scalp and would like to wash my every second day, I can get away with every 3 to 4 days.
  3. Use a purple shampoo to neutralize warm, brassy tones from mineral buildup and oxidation. Get an in-salon toning service.
  4. Protect your hair from the sun. Use a UV protectant and wear a hat.
  5. Protect your hair from chlorine. Saturate with conditioner then wear a swim cap.
  6. Hydrate your hair. Use oil treatments, deep conditioners, leave-in conditioners, hair masks, in-salon moisturizing treatments.
  7. Use sulfate-free, salt-free, color safe, moisturizing shampoo.
  8. Avoid styling products with sodium and drying alcohols.
  9. Protect your hair from heat. If you need to use heat, protect your hair with a heat protectant and low temperature setting.
  10. Protect your hair from mechanical damage. Avoid backcombing, use a wide tooth, wooden comb or brush, detangling from the ends of the hair up.

Thank you for reading.

The Ordinary Multi-Peptide Serum for Hair Density

Deciem’s recently launched hair care from The Ordinary, Multi-Peptide Serum for Hair Density, replaces Deciem’s discontinued Stemm product (which I also used likely about 2 years ago now). This is a concentrated serum that claims to make hair look thicker, denser, healthier and fuller. This is more of a first impression post (this product has not been on the market long enough for anyone to see results of the claims). I wanted to post some before photos of my hair and invite you to follow/check back, I expect in about 3 to 6 months, when I hope to see some results.

ic-2704341858482.jpg

Ingredients: Aqua (Water), Propanediol, Butylene Glycol, Glycerin, Caffeine, Biotinoyl Tripeptide-1, Acetyl Tetrapeptide-3, Larix Europaea Wood Extract, Pisum Sativum Extract, Scutellaria Baicalensis Root Extract, Triticum Vulgare Germ Extract, Glycine Soja Germ Extract, Trifolium Pratense Flower Extract, Camellia Sinensis Leaf Extract, Apigenin, Oleanolic Acid, Arginine, Glycine, Calcium Gluconate, Zinc Chloride, Lactic Acid, Gluconolactone, Dextran, Maltodextrin, Hydroxyethylcellulose, Xanthan gum, Pentylene Glycol, Dimethyl Isosorbide, Polysorbate 20, PPG-26-Buteth-26, PEG-40, Hydrogenated Castor Oil, Trisodium Ethylenediamine Disuccinate, Sodium Metabisulfite, Sodium Benzoate, Phenoxyethanol, Chlorphenesin

The serum is thin and slightly yellow. It contains 1% caffeine by weight, and with a quick search I found an article citing the Journal of Dermatology that says “topical treatment with caffeine resulted in the increase in average growth of hair follicles by around 46%. It also extended its life cycle by 33%” and an article saying “hair products that contain caffeine are not able to reach the hair follicle and therefore can’t promote growth” though this was from a hair clinic. This contains the complexes Redensyl, Procapil, Capixyl, Baicapil and AnaGain. Redensyl is a complex that apparently gives better results than hair transplantation in 84 days with visible hair growth. Procapil apparently strengthens hair and prevents hair loss. Capixyl is a peptide from the extract of red clover that reduces the production of dihydrotestosterone (DHT) that causes thinning of the hair follicles which causes hair loss. Baicapil is an active of three plants that stimulates hair growth, increases hair density and reduces hair loss. AnaGain apparently reactivates hair growth, contributing to thicker, fuller hair. Deciem says that the above technologies make up 21.15% concentration by weight. Hydrogenated castor oil is toward the end of the ingredient list.

The ingredients sound promising, and I’m looking forward to seeing if this product works. For reference, I’m 37 years of age, my hair is fine (but I have a lot of it, other than the thinning front area of the head), I have some graying, I get my hair colored about twice a year and I have had thinning hair likely for a couple years now, more toward the front and sides of my head. I’m using the Multi-Peptide Serum on my eyebrows as well, as they are thinning and some hair follicles are likely dead due to over-tweezing in my early 20s.

I’ve used The Ordinary hair serum for about 4 days now. Putting a drop on my fingers, it has a slightly oily feeling for a few seconds, then a bit sticky for a few seconds and absorbs quite quickly into the skin. There is not really a smell to the serum.

Directions say to apply a few drops to clean, dry scalp ideally at bedtime and massage into scalp. This is a leave-on treatment. The first couple uses I parted my hair in a few areas and put a drop in each parted area toward the front of my hair and one drop on each side of my head (edges of the hair) and massaged into the scalp. This left a bit of an oily look and feel to the hair that lasted about 30 to 45 minutes until it absorbed and/or dried, so using before bedtime is ideal. I also tried putting a couple drops on my fingers then massaging into the scalp that way, but I’m not sure that applied product evenly to all areas. In the morning, my hair looked and felt normal with no greasy feeling or residue.

Update: September 2, 2018 – Three-month after photos coming soon; follow for a new Hair Density Serum post on September 8 or 9. Click here for 3-month after results and here for 6-month results.

Before photos:

Follow this space for after photos in the coming months.